WOVEN SHIBORI
Traditional Japanese shibori is a method of dyeing a piece of already
woven cloth. In Japan shibori is produced by hand stitching parallel
rows of running stitches across a piece of fabric. When stitching is
finished, cloth is gathered tightly by pulling the hand stitched yarns at
each edge and tieing in place. The fabric is then either dyed in a vat or
dye is painted onto the fabric. The folds in the gathered fabric resist the
dye to varying degrees, resulting in a wood grain pattern. Woven
shibori is a way of applying pattern to cloth.
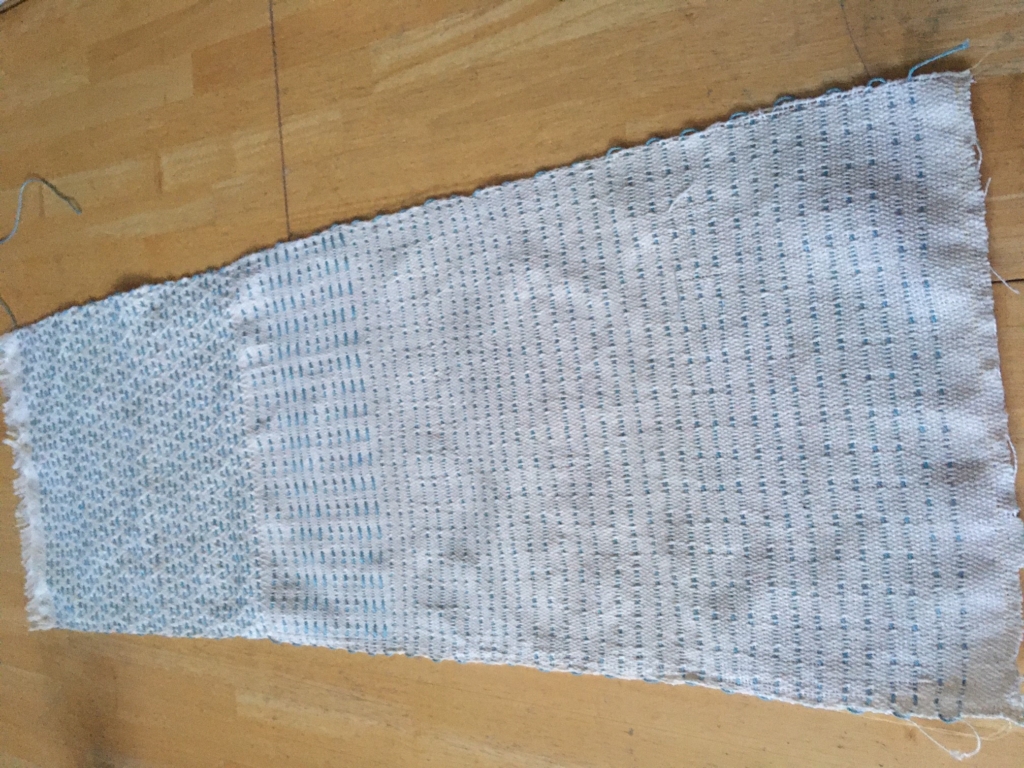
Woven shibori follows the Japanese method of gathering and dyeing
cloth. The difference is that the running stitches are placed while
weaving and are not stitched by hand. My sample is a most basic
example of woven shibori. Any threading can be used to produce
woven shibori as long plain weave is possible. Lace weaves, twills,
overshot , etc can be used for patterning. Plain weave and twills are
used for a background for shibori. While weavers enjoy precision and
control in their craft at the expense of surprise (sometimes!) woven
shibori ensures the excitement of opening the stitched, dyed cloth.
Shibori allowing us to look at our woven cloth in a whole new way. Now
for the specifics of woven shibori.
WARPING FOR SHIBORI
Check to make sure you have the correct dye for the fiber you have
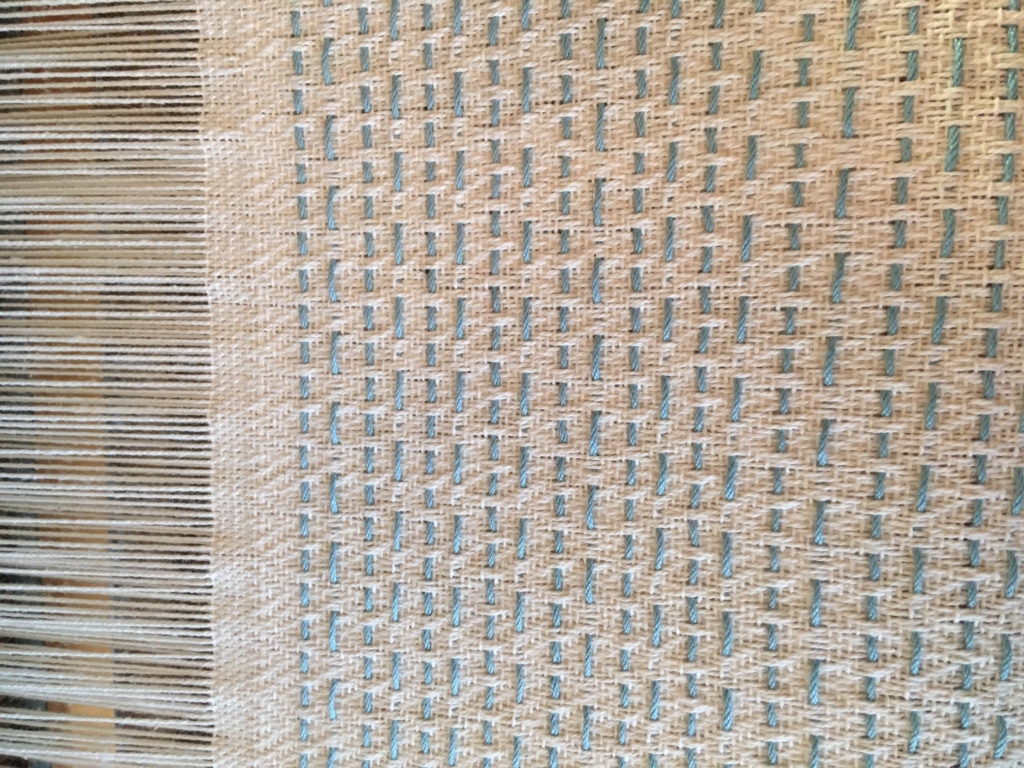
chosen to weave. Cotton is my choice. The sample is an 8 shaft point
twill 8/2 cotton sett at 24 EPI.
WEAVING SHIBORI
Begin an inch or so of plain weave. Pattern shots are thrown one at a
time, after weaving 4 shots of plain weave. Use two shuttles, one for
ground and one for pattern. Use a different color of some strong yarn
for pattern shots. On a 4 shaft threadling, a straight twill treadling
would be woven : pattern shot (12) followed by 4 plain weave shots
. Next pattern shot is (23) followed by four shots plain
weave, (34)etc. Do this for the entire length of the weaving. You can
throw twill shots instead of plain weave between pattern shots. I did
this for part of my sample.
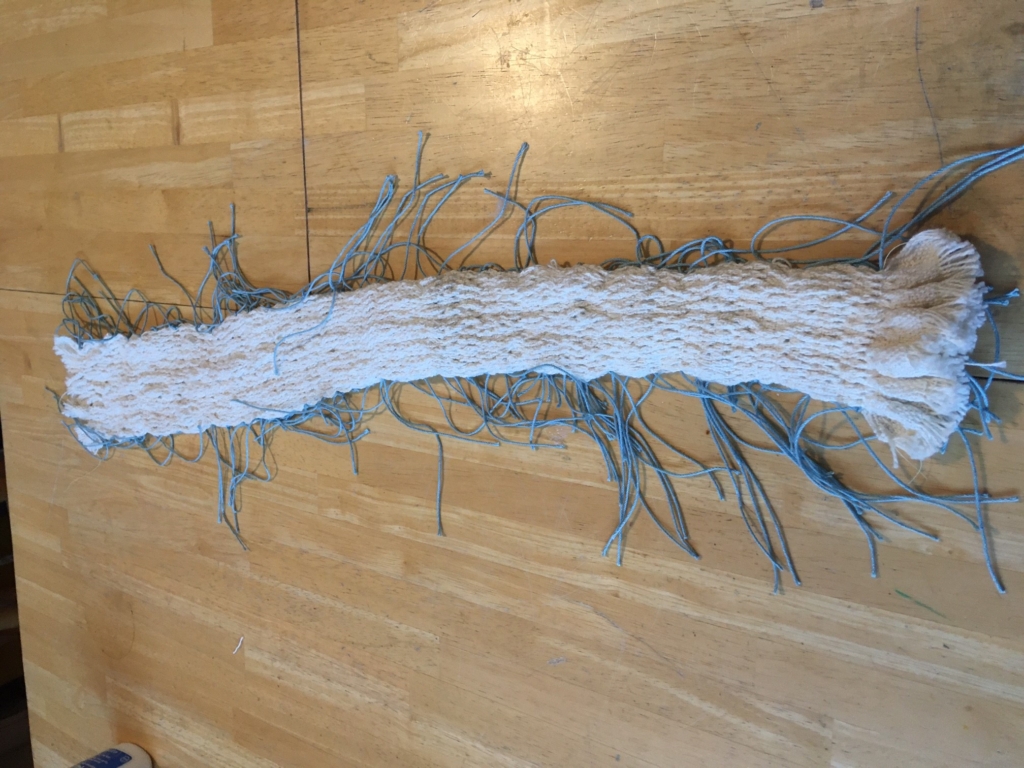
GATHERING PATTERN SHOTS ACROSS WEAVING
Start at one side and gently pull pattern shot until middle of piece is
reached. Pull a second pattern shot and tie these together at the edge
with an overhand knot. Next go to opposite side of weaving and take
same two pattern threads gently pulling to gather across warp to the
center, tie an overhand knot at edge to hold in place. Do this for the
length of piece.
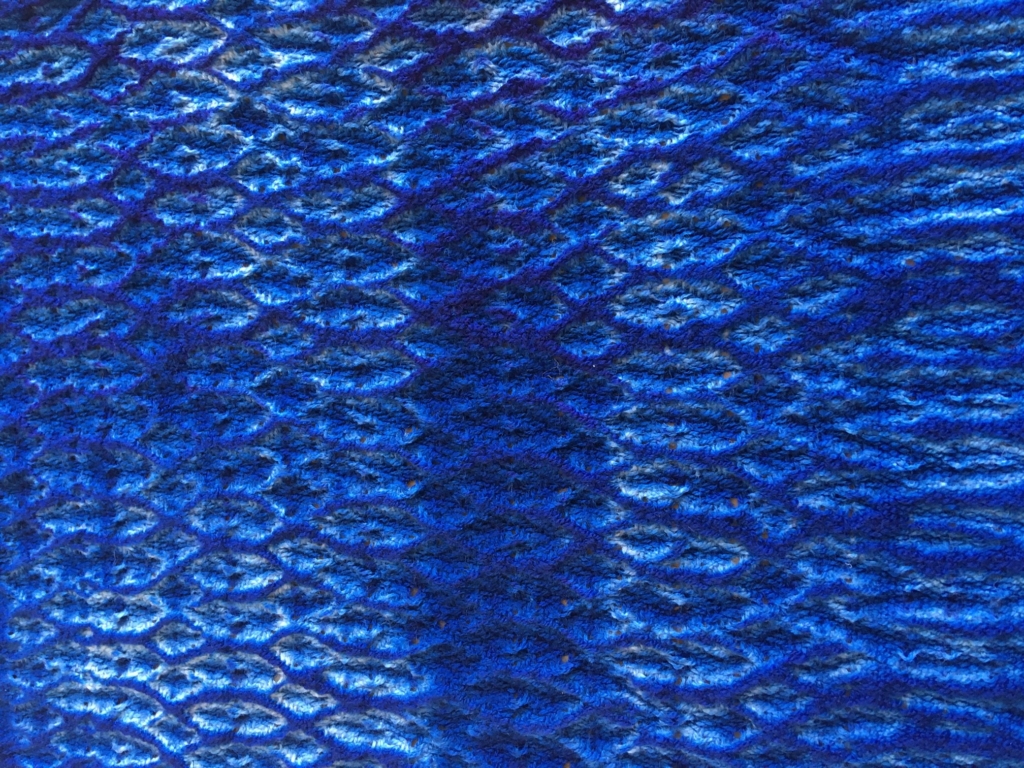
DYEING GATHERED FABRIC
Be sure you have correct dye for yarn you are using. Vat dyeing or
painting directly onto the gathered cloth can be done following
instructions for the dye used. Follow dye instructions for setting the
dye. When finished you can open immediately or wait before clipping
and removing the pattern threads to see what a wonderful design you
have produced!
**Source unknown